Learn how to make the Control Center on the Mac your own by adding, removing, rearranging, and resizing toggles to customize it for your workflow.
macOS Big Sur brought the Control Center to the Mac and macOS Tahoe 26 makes it fully customizable—just like on the iPhone and iPad. You can choose from a wider array of more than 80 built-in controls to quickly toggle system features without navigation through System Settings or memorizing keyboard shortcuts.
There are new controls for taking screenshots, locking the computer, creating timers, starting a voice recording, toggling background sounds, enabling Reduce Transparency to minimize the Liquid Glass effect, and more.
Follow along with our steps right ahead to learn how to personalize the Control Center on your Mac using the latest macOS Tahoe operating system.
macOS Tahoe: Edit the Control Center controls
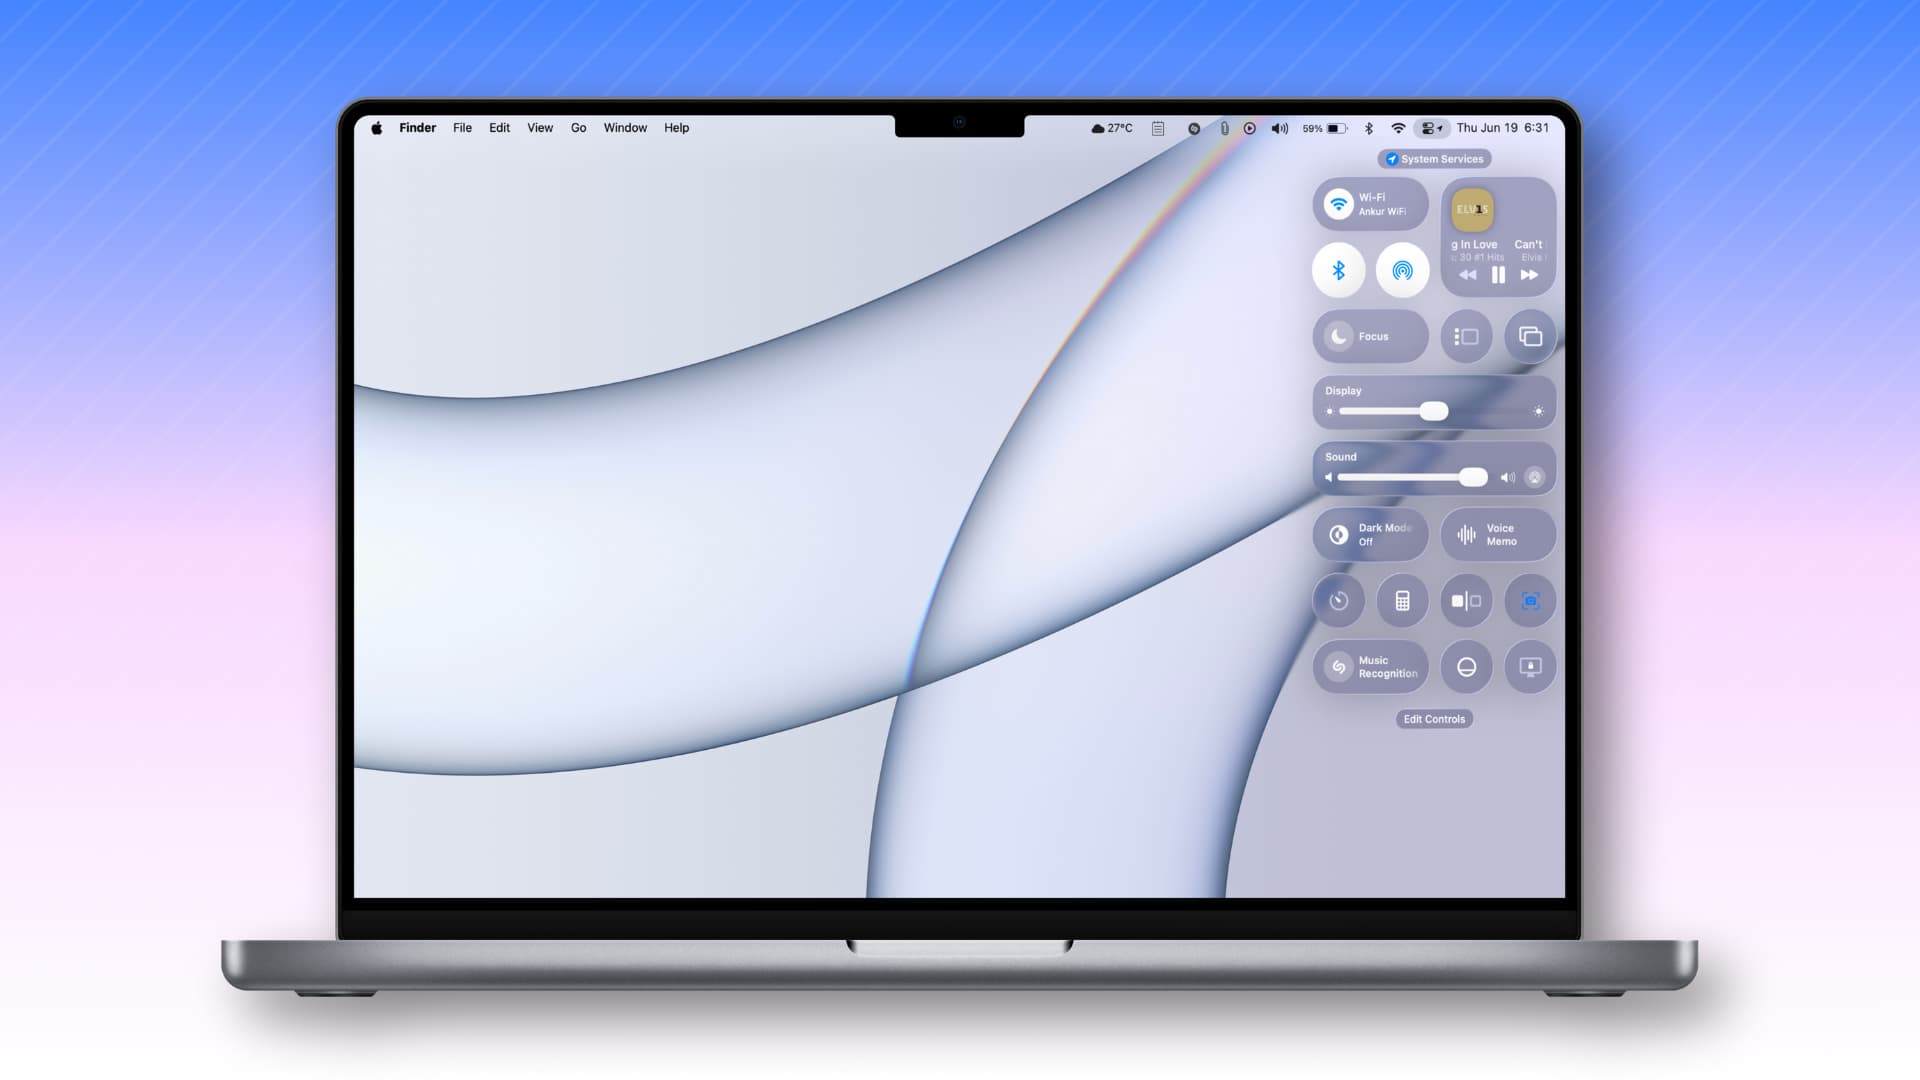
Click the Control Center icon in the menu bar (to the left of the current date and time) and choose the Edit Controls option. Or, open the Control Center and hold the Command key to rearrange the controls.

Add new controls
Click the Edit Controls button in the Control Center to open the gallery. Now select All Controls (or a specific control group) in the sidebar. On the right side, click a control and choose Add to Control Center in the menu. You can also drag a control from the gallery and drop it directly onto the Control Center itself.

You can also add Mac and iPhone controls from compatible apps to the Mac’s Control Center. Clicking an iPhone control will open the corresponding app in iPhone Mirroring on your Mac. Keep in mind there’s currently a bug in the iOS 26 and macOS 26 betas preventing adding controls from iPhone apps.
Remove existing options
Click the Control Center icon in the menu bar and then the Edit Controls button. You can now remove any control by clicking the minus button (-). Alternatively, open the Control Center and hold the Command key to remove unwanted controls.

You can pick from three sizes for the Control Center tiles: Large, Medium, and Small. Simply right-click or Control-click a toggle in the Control Center to choose size. This also works in the Control Center on the iPhone and iPad.

Some controls may not be available in all sizes. Also, certain controls like Timer don’t support tile sizes at all.
You can freely move controls within the Control Center to any spots you want. Click Edit Controls or hold the Command key, then drag a control to a different spot.

What are your thoughts on Tahoe’s more functional Control Center? Let us know in the comments below!
macOS Tahoe is in beta
macOS Tahoe is currently in beta. To try out the newest features like the customizable Control Center and the glassy design overhaul, install the macOS 26 beta on a separate partition so you can boot either into your current macOS version or Tahoe. If you’re installing macOS 26 on multiple Macs, create a bootable USB installer.
Also, check out: